
Getting started with Google Analytics: Best Practices Upon Setup
In this blog we’re going to talk about the Google Analytics dashboard and how to enable some critical features. These features do not come standard with freshly created accounts – so whether your account is new or not, make sure the accounts are set up properly. Let’s begin!
The basics:
Rule 1: Don’t get overwhelmed, and don’t worry about half the stuff on your admin panel – 90% of it is feature overkill.
With that in mind, let’s dive in. Your admin dashboard will look like this:
What you are looking at are all the options for Accounts, Properties, and Views – looks daunting! But it’s really not.
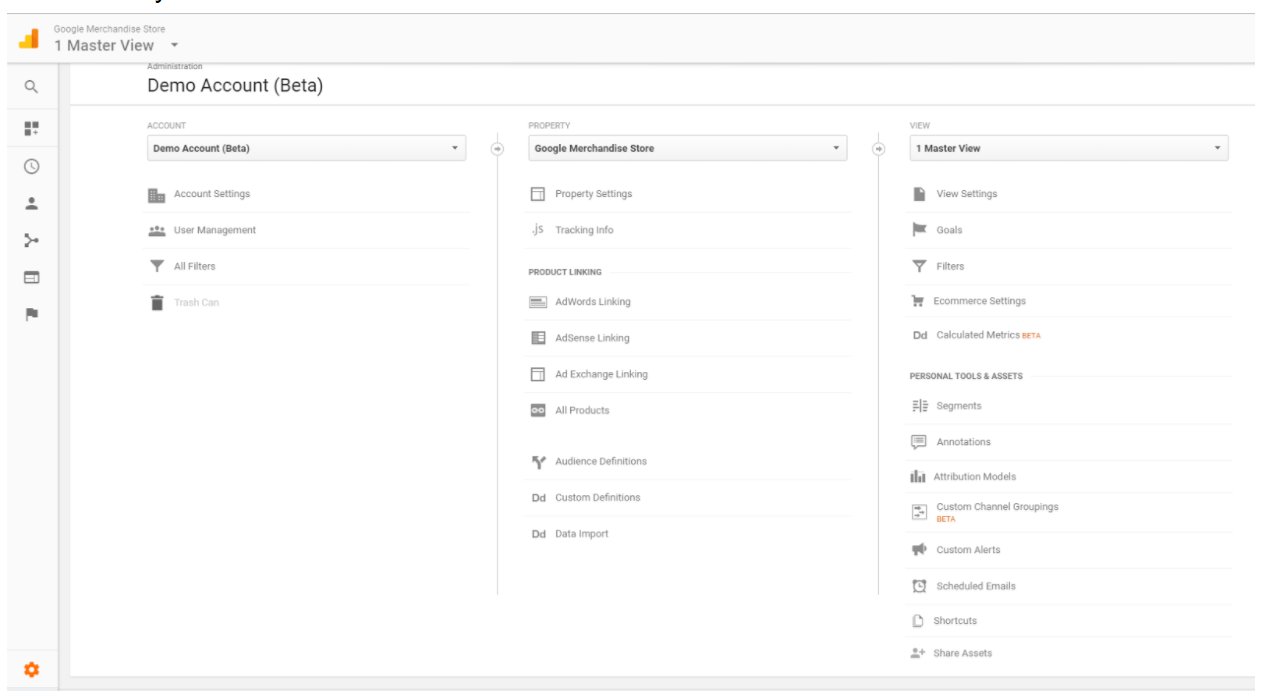 Let’s unpack this
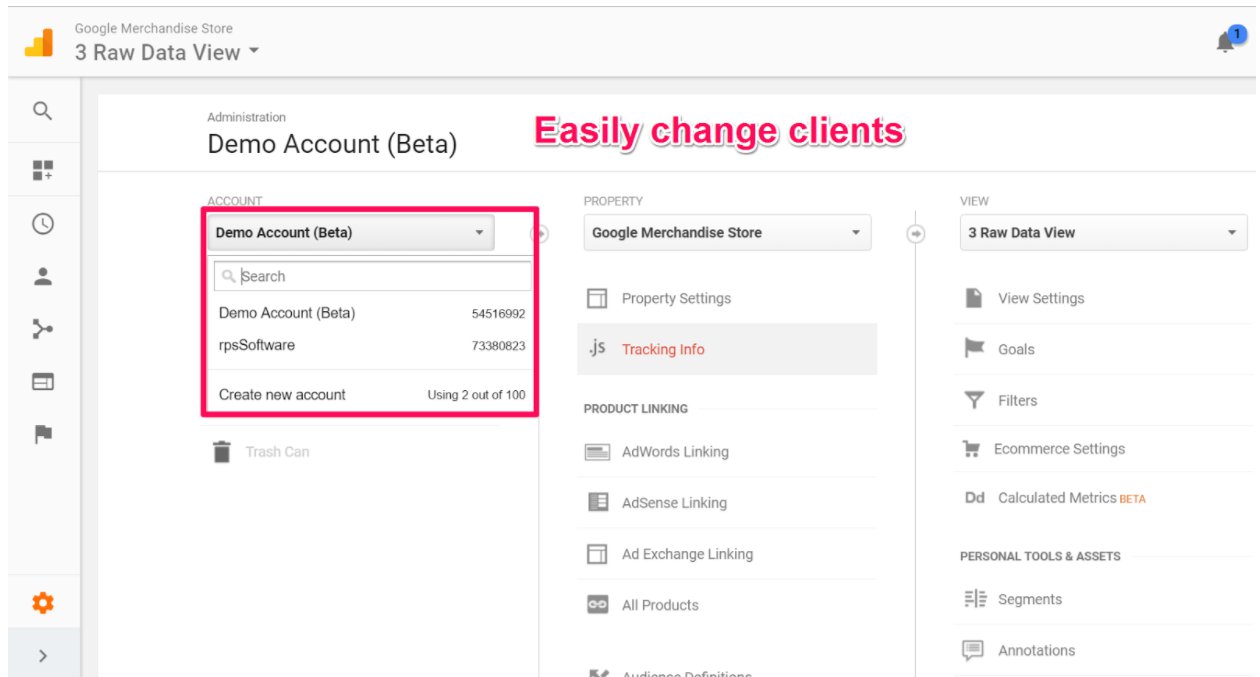
Accounts
Simply speaking, Accounts can have multiple properties aka websites. This is helpful for people like me who want to easily access multiple clients “Accounts” without having to log out and back in again to gain access. Some of my client’s accounts have multiple websites – so having them all linked to one dashboard is actually very convenient.
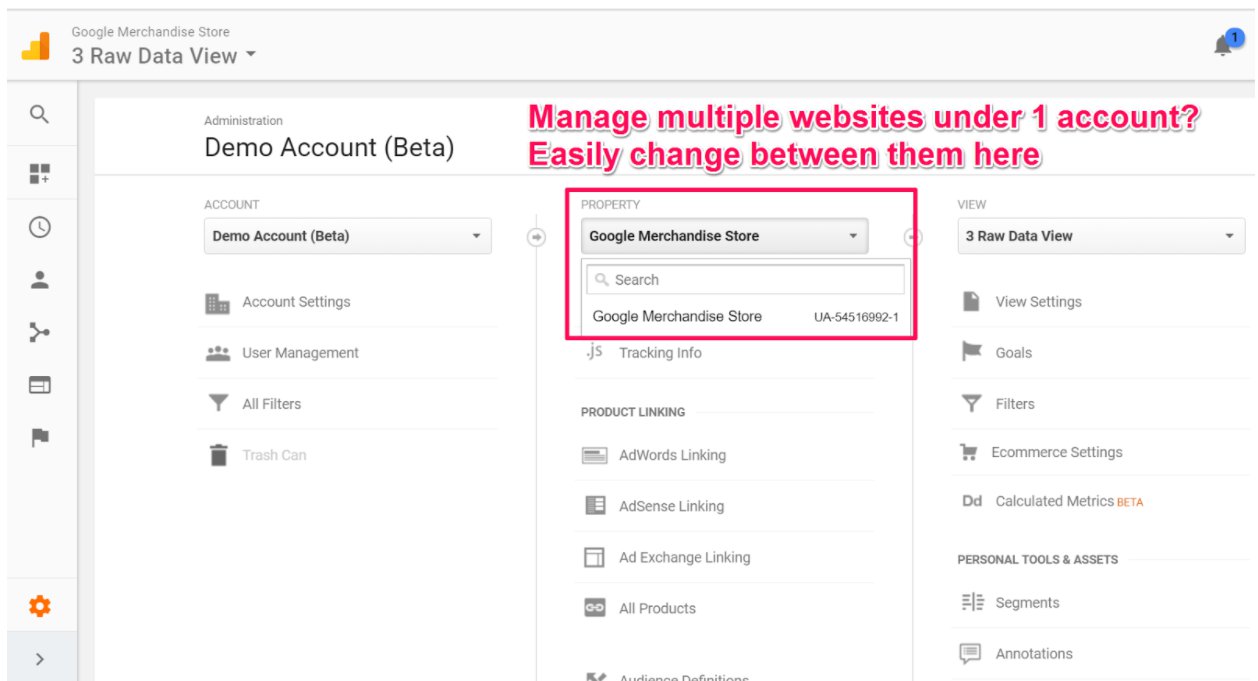
 Property and View
Just like Accounts can have multiple Properties ( websites ), Properties can have multiple views. A view is a group of data saved for easy access. For instance, if you wanted to only access analytics from your North American web users, you could create a filter to only show North American web traffic. Then you could easily access this without having to manually filter non-North-American traffic out every time. It’s convenient – but for our examples we are not going to get too fancy with this, albeit I think it’s important to know the difference between Accounts, Properties and Views.
 Now you know the difference between the hierarchy of accounts, properties and views. For the rest of this tutorial we are going to be working on one account, one property and one view to keep things uber simple. I think it’s just easier this way, and easier is always better.
Ok, let’s go back and manage some of the top options in Accounts, Property and Views.
Accounts:
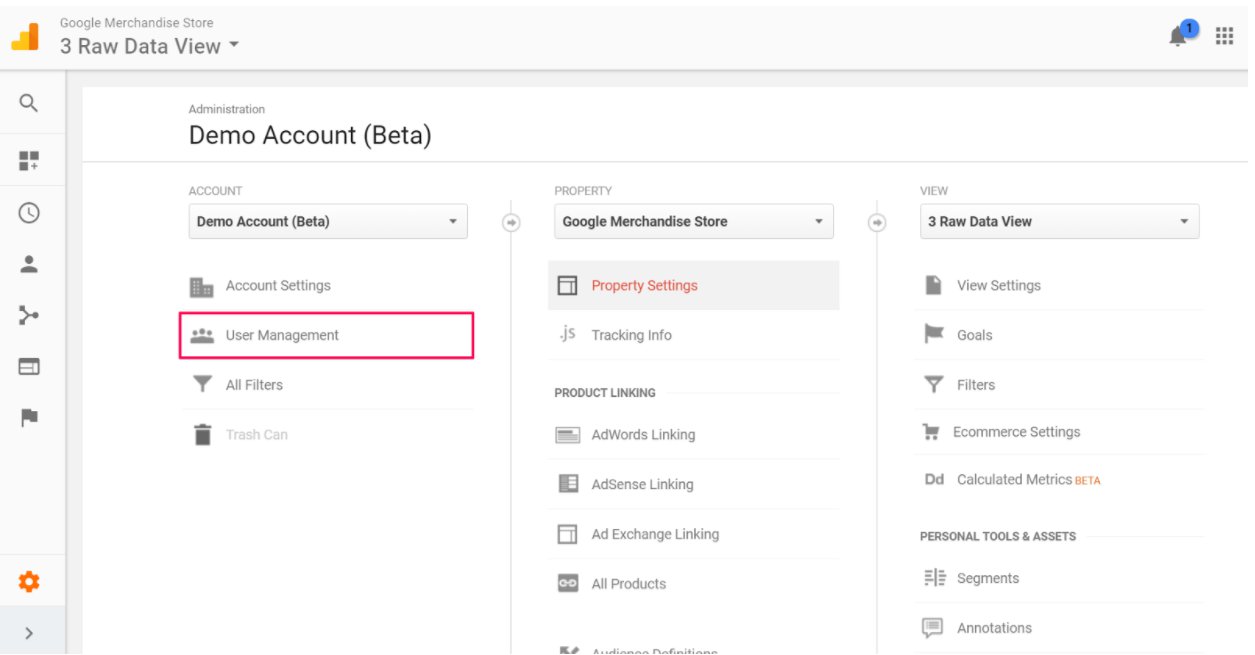
First thing you need to do is give access to your team so they can log in and run reports without having to log out of their personal Google account. When you give them access they will automatically have access to any associated properties or views under the account.
One of my biggest nerd pet peeves is when people create an individual Google account for each analytics account they manage. AND it drives me BANANAS when I see users sharing the username and login for an account as opposed to giving each other access. I cringe at the thought of having to log out and back in when Google has set this up to be agile and easy! You should be anal like me and scoff at the thought of working unnecessarily harder. That is why we are now going to learn how to give your teammates access now
Go to User Mangement, at which point you will see a screen with the option to invite users by way of email to anyone your heart desires. It is as simple as that!
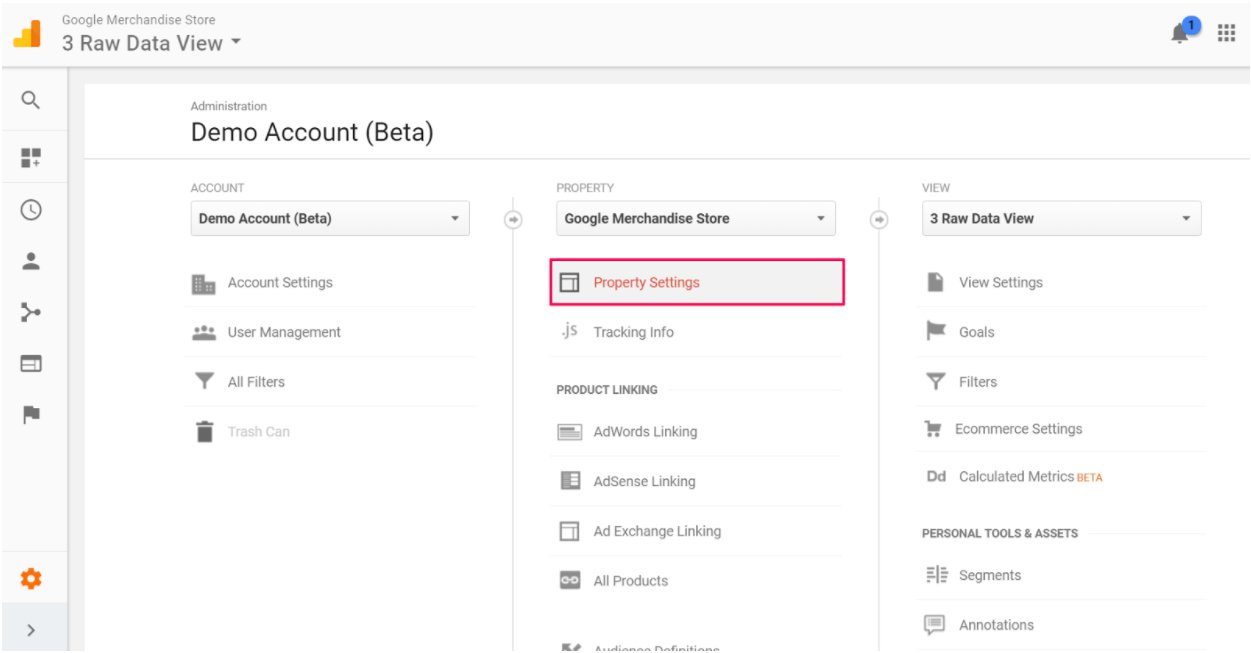
 After you have your team on board, it’s time to do move on from the Account options, and onto “Property”. Select “Property Settings”. We’re going to enable some items so you can begin tracking some specific metrics.
Life Pro Tip: Google Analytics will not, and cannot pull or modify historical data – meaning if you don’t enable or set up your account properly in the beginning, your reports will not be accurate – or just won’t have any recorded data.
Let’s enable Demographic reporting to start tracking:
 Turn this on and begin tracking. That’s it, I told you this was simple!
 Don’t worry about the rest of those fancy features for now, let’s keep this momentum going, we’re on a roll!
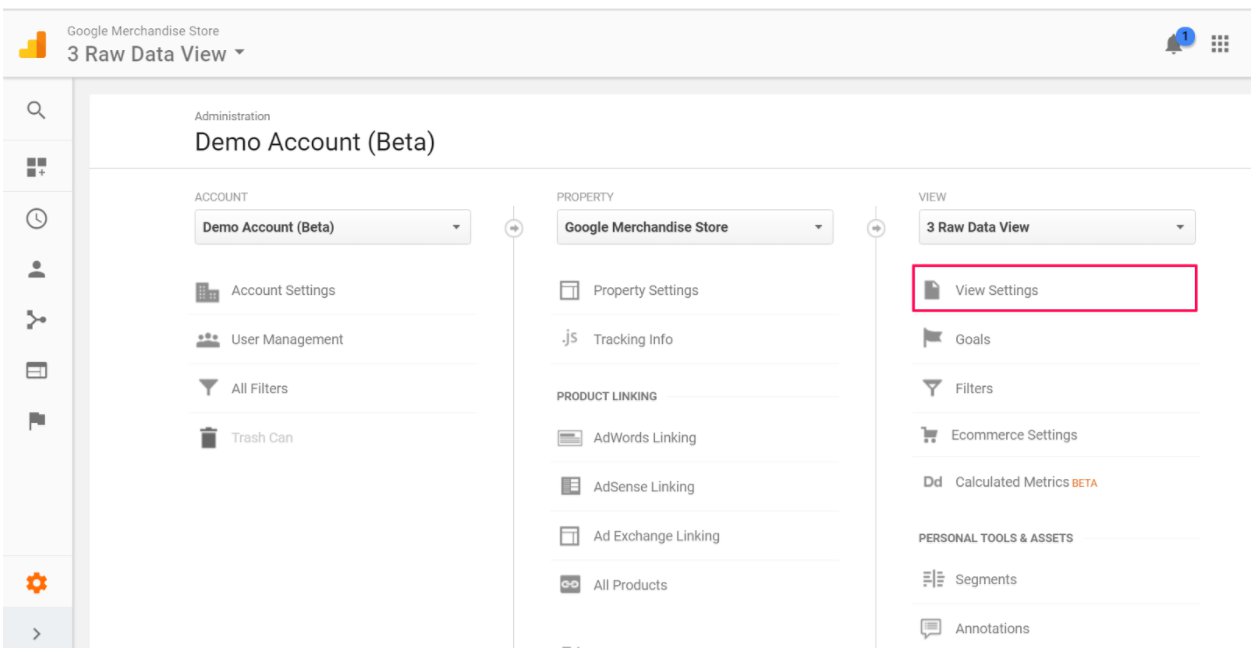
View Settings:
The easy way to filter spam traffic. Because your data driven decisions are only as good as the data they are based on. If your data is riddled with spam then you’re going to have a bad time. Don’t have a bad time, kill the spam.
 We are going to filter out spam the easiest way there is, by selecting the easy button: Select to Exclude bots and spiders and UPDATE! Do it now!
 Great Job! You are making moves and taking names. I am proud of you.
Next, if you have a search feature on your site, like many sites do, you will want to gather analytics on search terms ( we are having a lesson on these metrics – so be sure to implement this )
How to enable on site search analytics
Go to your site
Do a search on our site for a keyword – any keyword – I will use “test” for this example
 Hit enter and check out the URL of the results page on your website. The letter right before the equal sign, before your search term is the letter you want to add as the “Parameter” In this example ( and most wordpress sites ) the letter will be an S
 So we add that letter S to our seemingly overly complicated option “Query parameter”. Hit update and viola, we are now tracking all search terms on your site. Great job!
 And that’s it! Great job, we learned the difference of account, property, and view, we have given access to your team, blocked spammy traffic, enabled demographics and enabled search reporting as well. You are now ready for the next level: setting up your goals. Strap in, grab an energy drink and hold onto your butts.
This is where the magic happens.