
Let’s get set up!
In this tutorial, we are going to create our account and verify everything is installed properly.
Why this is important:
Too often I stumble on accounts that are not configured correctly. I get into an account only to find that the traffic has not been properly tracked and therefore all the historical data is not valid. You can imagine the despond this fills my soul with when I have to break the news to a colleague or client. Unfortunately, there is no way to retrieve historical data in Google Analytics and therefore an account would need to be reimplemented to begin tracking correctly.
Step 1 Getting set up with a new Google Analytics account if you ALREADY have a Google analytics account. If you don’t have an account, read this anyway – it will be relevant when creating future accounts.
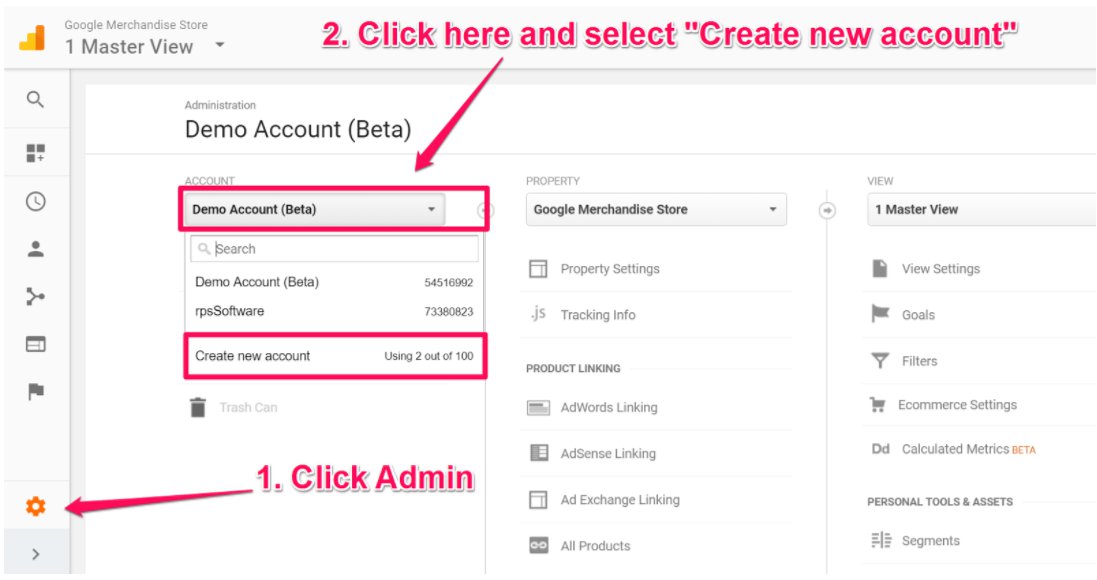 If you already have a google account you use for analytics, you can navigate to your dashboard and click “Add New Property” and skip to step where we implement the code onto your site. Do not create a new google account! Keep all of your google services under one account, trust me, it’s just easier this way. You can give permissions to any of your associated accounts, friends, family or pets. Proceed to step 2.
Step 1 Getting set up with a new Google Analytics account if you DON’T a Google analytics account.
- If you don’t have a google account, head on down to Google.com Headquarters and create a new account.
- https://accounts.google.com/signup?hl=en
Step 2: Signing up for Google Analytics with your new Google account
Go to https://www.google.com/analytics sign in (if you aren’t automatically already signed in)
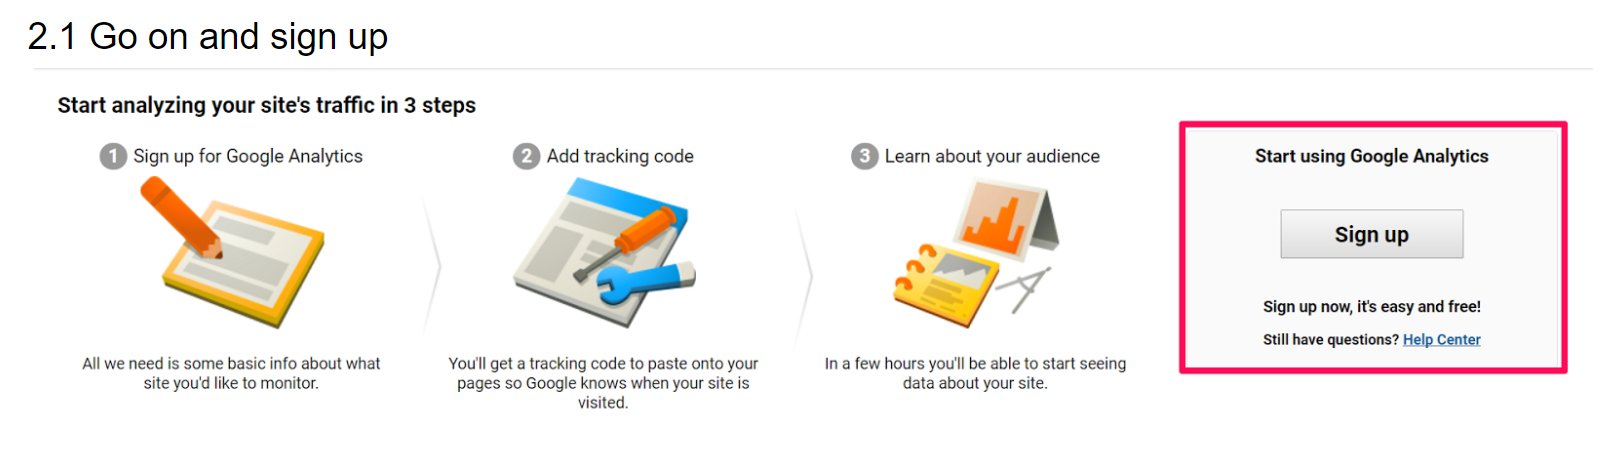
 2.1 Go on and sign up
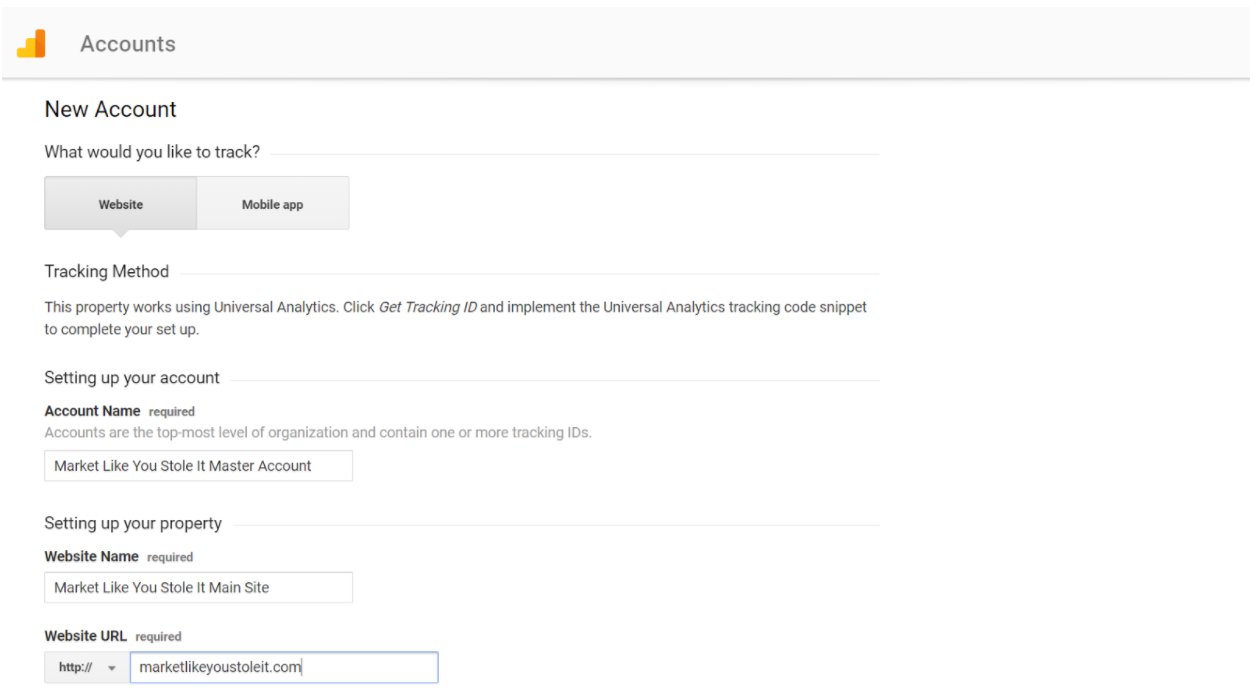
 2.2 Fill out the necessary fields to begin
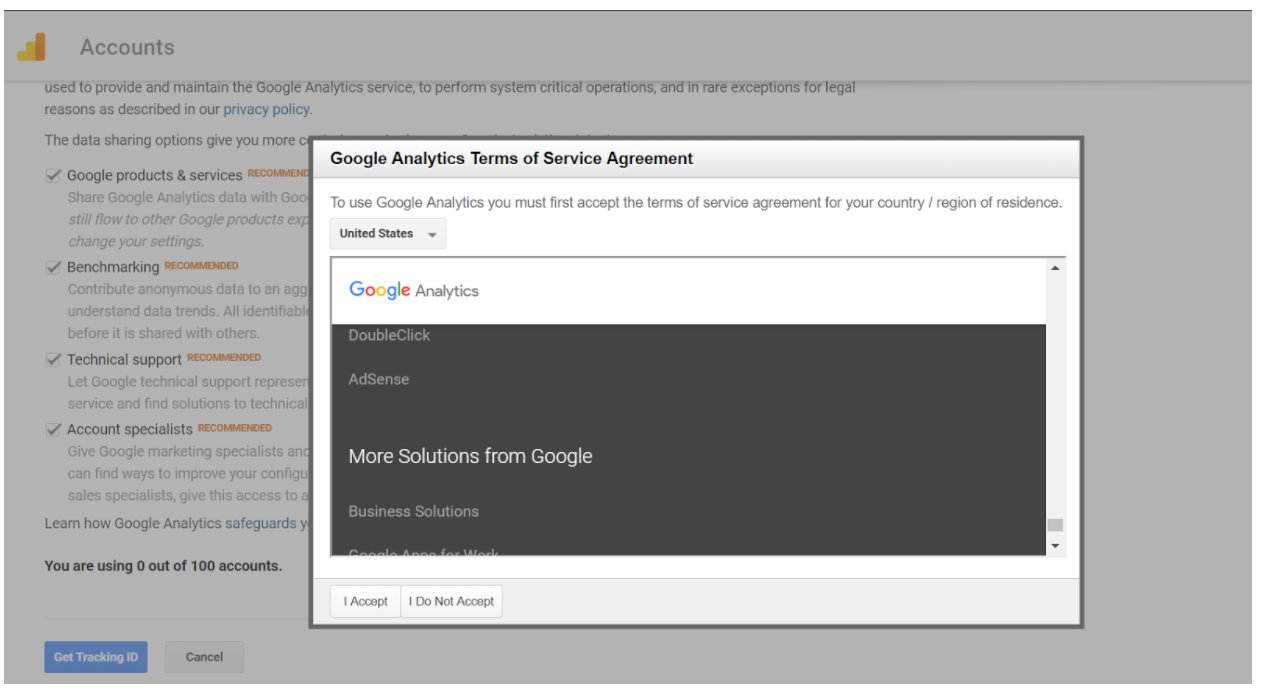
 2.3 Sign your life away
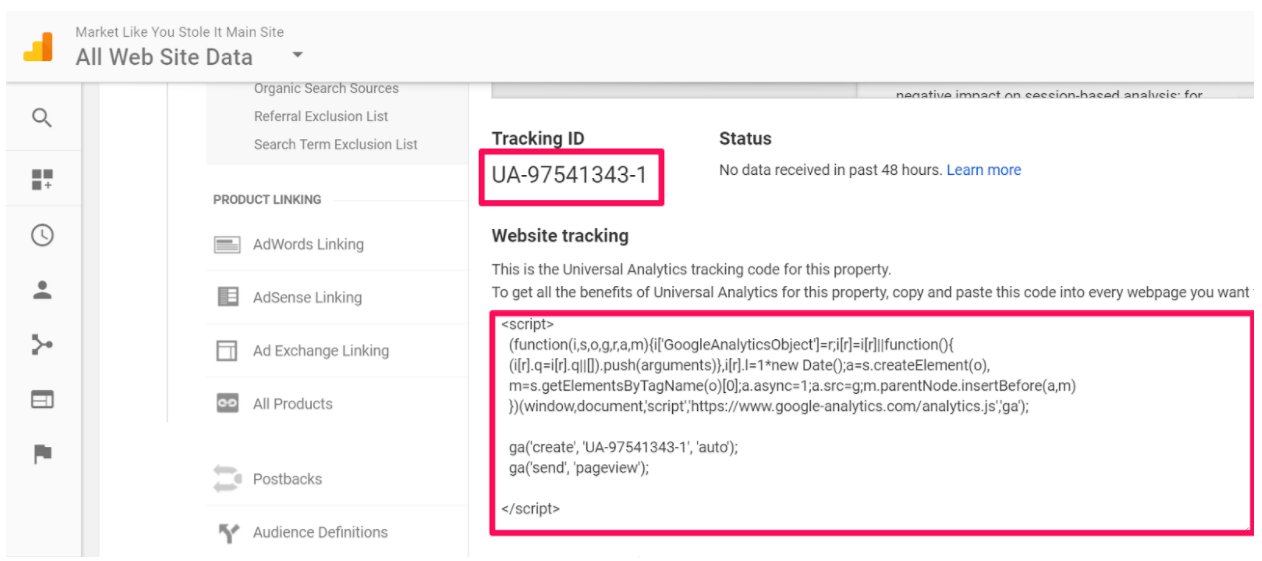
 2.4 After you sign your life away, you will be taken to this screen which you will see the tracking ID and the script you will need to implement to begin tracking
 Step 3: Getting your code installed
You can implement this magical code <script> by either adding that fancy code to the header or footer of your site or if you are using wordpress, you may install a plugin to assist with this technical step. I recommend analyticator – makes life easy.
https://wordpress.org/plugins/google-analyticator/
Step 4: Checking your work; verifying its installed
Let’s go ahead and verify its actually installed and working
4.1 Install Google tag manager in chrome: Chrome Google Tag Manager ( Yes you’ll need chrome – this is a tutorial on google products, so we keep everything in 1 suite )
4.2 Navigate to Property > Tracking Info > Tracking code
You will see this dashboard:

4.3 Go to your website and click the google tag manager and make sure the tracking code is the same
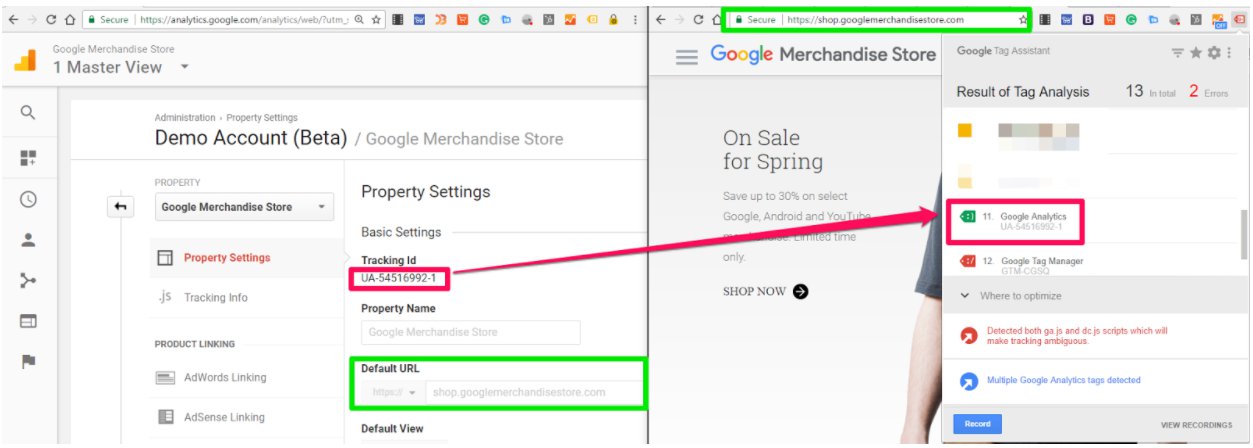 If you have a match then SUCCESS, your code is implemented properly
- If not, you will have some soul seeking to do. Get some help, you don’t want to track web traffic if it’s not actually configured correctly
Ok, now that we’re set up with our account and it is configured correctly it is time to do some housekeeping. In the next tutorial, we review some of the basic maintenance you should always perform on your account to enable features, block spam traffic and other ancillary tasks that don’t come standard with freshly created accounts.
Check that blog out here: Google Analytics Best Practices